Subsections of Dialogs
MessageBoxes
Message Boxes
The MessageBox
class (found in the System.Windows.Forms
namespace) provides a simple mechanism for displaying a message and obtaining one of a few simple responses from the user. The most common usage of a MessageBox is to call one of its various Show
methods, each of which is static
. The simplest Show
method takes a string as its only parameter. The method then displays this string in a modal dialog containing an “OK” button. Thus, for example,
MessageBox.Show("Hello world!");
will display the following dialog:
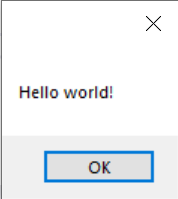
Because the dialog is modal, it will block all other interaction with the program until the user closes it by clicking either the “OK” button or the “X” in the upper right. Furthermore, the Show method will not return until that time.
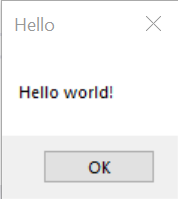
Other Show methods allow greater customization of a MessageBox. For example, one Show
method takes as an additional parameter a second string giving a caption for the MessageBox. Thus, the statement,
MessageBox.Show("Hello world!", "Hello");
will display the following modal dialog:
Other Show methods allow the buttons to be customized. For example, one Show
method takes, as its third parameter, an element from the MessageBoxButtons
enumeration
. This enumeration
contains the following values:
- MessageBoxButtons.AbortRetryIgnore: Buttons labeled “Abort”, “Retry”, and “Ignore” are shown.
- MessageBoxButtons.CancelTryContinue: Buttons labeled “Cancel”, “Try Again”, and “Continue” are shown.
- MessageBoxButtons.OK: A single button labeled “OK” is shown.
- MessageBoxButtons.OKCancel: Buttons labeled “OK” and “Cancel” are shown.
- MessageBoxButtons.RetryCancel: Buttons labeled “Retry” and “Cancel” are shown.
- MessageBoxButtons.YesNo: Buttons labeled “Yes” and “No” are shown.
- MessageBoxButtons.YesNoCancel: Buttons labeled “Yes”, “No”, and “Cancel” are shown.
The values above containing the word, “Cancel”, cause the “X” in the upper-right of the dialog to be enabled. Clicking this button in these cases is equivalent to clicking the “Cancel” button. The value, MessageBoxButtons.OK, also enables this “X” button, but in this case, clicking this button is equivalent to clicking the “OK” button. Using a Show without a MessageBoxButtons parameter also gives this behavior. For all other MessageBoxButtons values, this “X” button is disabled.
In order to provide appropriate functionality to each of the buttons, each Show method returns a value of type DialogResult
. This type is another enumeration containing the following values to indicate which button the user clicked:
- DialogResult.Abort
- DialogResult.Cancel
- DialogResult.Continue
- DialogResult.Ignore
- DialogResult.No
- DialogResult.None (this value won’t be returned by any of the Show methods)
- DialogResult.OK
- DialogResult.Retry
- DialogResult.TryAgain
- DialogResult.Yes
Suppose, for example, that we are writing a document formatter or some other application in which the user builds a document. If the user attempts to exit the program when the document is unsaved, we would like to give an opportunity to save the document. We can accomplish this with the following code:
DialogResult result = MessageBox.Show("The file is not saved. Really quit?", "Confirm Quit", MessageBoxButtons.YesNo);
if (result == DialogResult.Yes)
{
    Application.Exit();
}
The first statement displays the following dialog:
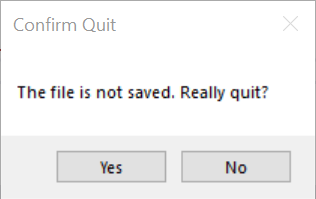
Again, because the dialog is modal, the Show method does not return until the user closes the dialog by clicking one of the two buttons (the “X” in the upper right is disabled). When the user does this, the dialog closes, and the Show method returns either DialogResult.Yes or DialogResult.No to indicate which button the user clicked. If the user clicked the “Yes” button, then the if-statement will cause the program to terminate. Otherwise, the program will continue with whatever code follows (probably nothing more, as the program will need to await further user action).
We can also decorate a MessageBox with an icon that indicates what type of message it is. This requires another Show
method having a fourth parameter of type MessageBoxIcon
. MessageBoxIcon is another enumeration. Some of its values are:
- MessageBoxIcon.Error:

- MessageBoxIcon.Information:

- MessageBoxIcon.None (no icon)
- MessageBoxIcon.Warning:

This enumeration contains a few other values as well, but they currently are simply duplicate values for the above icons or values that Microsoft recommends against using. To add a warning icon to the above example, we could replace the first statement with:
DialogResult result = MessageBox.Show("The file is not saved. Really quit?", "Confirm Quit", MessageBoxButtons.YesNo, MessageBoxIcon.Warning);
This will display the following dialog:
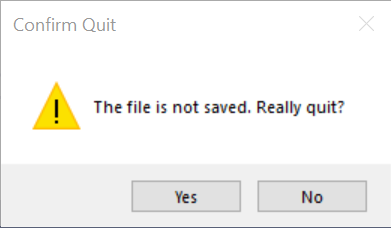
Notice that in the above example, the “Yes” button has the focus; i.e., pressing “Enter” has the same effect as clicking this button. It is usually desirable to have the safest response as the default - in this case, the “No” button. To achieve this, a Show
method having a fifth parameter, of type MessageBoxDefaultButton
, is required. MessageBoxDefaultButton is another enumeration having the following values to select an appropriate button to be the default:
- MessageBoxDefaultButton.Button1
- MessageBoxDefaultButton.Button2
- MessageBoxDefaultButton.Button3
- MessageBoxDefaultButton.Button4
Thus, the following statement:
DialogResult result = MessageBox.Show("The file is not saved. Really quit?",
    "Confirm Quit", MessageBoxButtons.YesNo, MessageBoxIcon.Warning,
    MessageBoxDefaultButton.Button2);
produces a dialog similar to the one above, but having the “No” button as its default.
There are other Show methods that allow additional fine-tuning; however, the ones described here cover most of the functionality. For details on other Show methods, see the documentation for the MessageBox class
.
File Dialogs
File Dialogs
The System.Windows.Forms
namespace contains two other classes that implement modal dialogs for obtaining file names from the user. These classes are OpenFileDialog
, which is designed to obtain the name of a file to read, and SaveFileDialog
, which is designed to obtain the name of a file to write. Because we often need to obtain the name of a file prior to doing file I/O, it is appropriate to consider these classes now.
Although these dialogs are visually separate from the window from which they are opened, it is possible (and usually desirable) to add instances of these classes to a form from the Design window
. Both can be found in the “Dialogs” section of the Toolbox. They can be added to the form simply by double-clicking on their names. They will not appear on the form itself, but in a separate area of the Design window. Their properties can then be modified in the same way as any other control. We will discuss some of these properties a bit later in what follows.
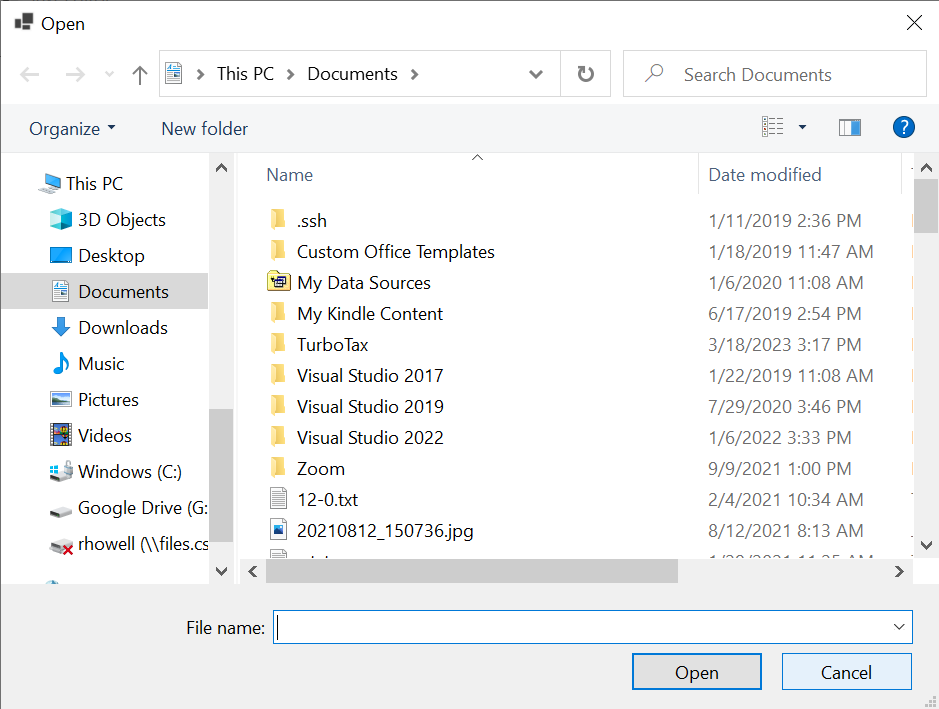
Each of these classes has a method called ShowDialog that takes no parameters. For example, if we call the ShowDialog
method of an OpenFileDialog, a dialog resembling the following will be opened:
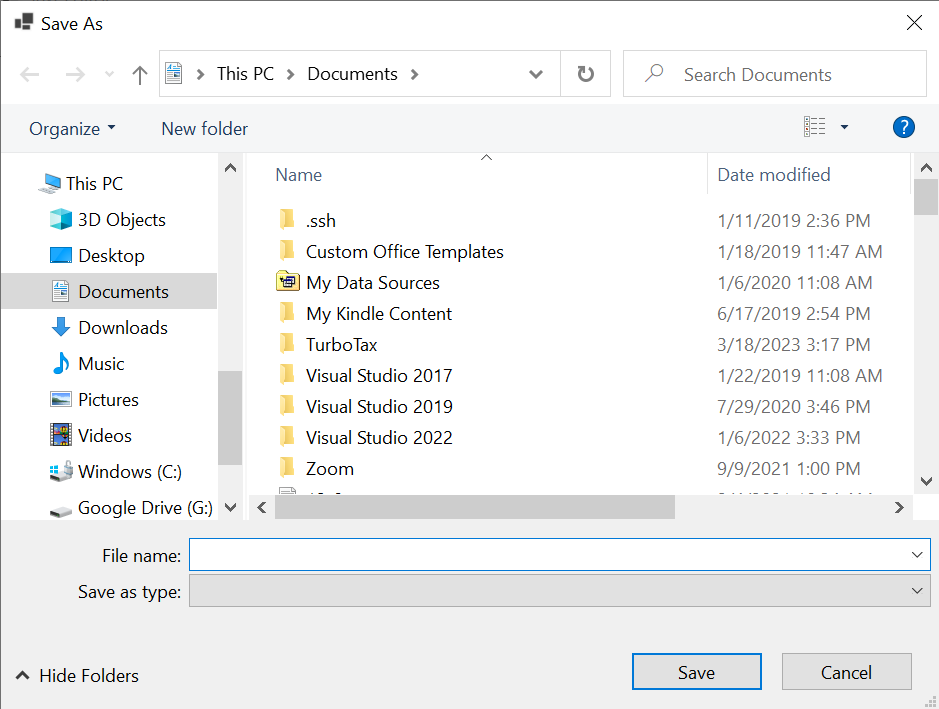
Similarly, calling the ShowDialog method of a SaveFileDialog opens a dialog resembling the following:
Because these dialogs are modal, the method call will not return until the user closes the dialog. It will then return a DialogResult
indicating how the user closed the form - either DialogResult.OK or DialogResult.Cancel (see the previous section
for more information on the DialogResult type). Therefore, if uxFileDialog is a variable referring to a file dialog, we typically use the following code template to display it:
if (uxFileDialog.ShowDialog() == DialogResult.OK)
{
    // Process the file
}
Thus, if the user selects a file, we process it; otherwise, we do nothing. In some cases, we might include an else containing code that needs to be executed if the user closes the dialog without selecting a file.
Processing a file will be discussed in the three sections that follow. However, one thing we will certainly want to do prior to processing the file is to obtain the file name that the user selected (after all, this is the reason we display a file dialog). We can obtain this file name via the dialog’s FileName
property
; for example,
string fileName = uxFileDialog.FileName;
Note that this and other properties are accessible for initialization purposes through a file dialog’s Properties window in the Designer. This is useful for an OpenFileDialog’s FileName property, as the default supplied by Visual Studio® is rather odd. Other properties that we might want to initialize here (in addition to (Name), the name of the variable referring to the dialog) include:
-
Title
, the title of the dialog (by default, “Open” for an OpenFileDialog or “Save As” for a SaveFileDialog).
-
Filter
, a filter string, which controls what file types will be displayed. An example of a filter string is: C# files|*.cs|All files|*.*. A filter string consists of an even number of components separated by vertical bars ("|"). Thus, the above filter string consists of four components. These components are grouped into pairs. The first component of each pair gives the string that will be displayed in the dialog to describe what files are displayed. The second component of each pair describes a pattern of file names to be displayed when the first component of that pair is shown. Use an asterisk ("*") in a pattern to denote any sequence of characters. The “.” in a pattern ending in “.*” does not need to be matched - a file without an extension will be listed if it matches the pattern to the left of the “.”. Multiple patterns, separated by semicolons (";"), may be listed in one component. Thus, the above filter string describes two filters that the user may choose from. The first filter is labeled, “C# files”, and lists all files ending in “.cs”. The second filter is labeled “All files”, and lists all files.
-
FilterIndex
indicates which pair in the filter string is currently being used. Note that the first pair has an index of 1, not 0.
-
AddExtension
and DefaultExt
control the dialog’s behavior when the user types in a file name without an extension. When this happens, if a filter with a unique extension is chosen, that extension will be appended, regardless of the values of these two properties. Otherwise, if AddExtension is True, the value of DefaultExt will be appended, following a “.”.
Other properties allow further customization of file dialogs. For more
details, see the OpenFileDialog
and SaveFileDialog
documentation.
Custom Dialogs
Custom Dialogs
While the dialogs provided by the .NET Framework are useful in a variety of applications, there are times when we need to be able to design our own special-purpose dialog to obtain specific information from the user. This section outlines how Visual Studio® can be used to build such a dialog.
Let’s begin by considering a simple example. Suppose we are building an application that needs a dialog to obtain from the user the following pieces of information:
- a name;
- a phone number; and
- a number of siblings.
In order to keep the example simple, the program will simply display this information in its main window. Thus, the main window looks like this:
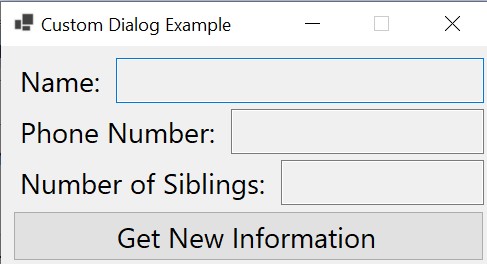
Clicking the “Get New Information” button will open our custom dialog, which will look like this:
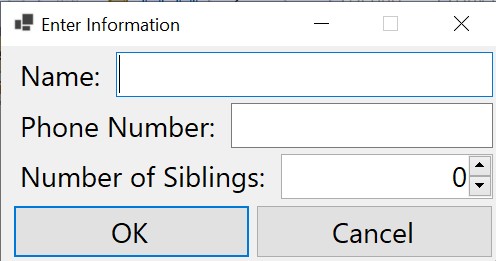
After the user enters the information, clicking “OK” will cause the information entered to be displayed in the main window. If the user clicks “Cancel”, the main window will be unchanged.
After building the main form in Visual Studio’s Design Window, we can build the dialog by creating another form. To do this, in the Solution Explorer, right-click on the project name and select “Add->Form (Windows Forms)…”. This will open a dialog for adding a new item, where the type of item is pre-selected to be a Windows Form. You will need to supply a name for the form. This name will serve as both a file name for a source file and the name of a class defined within this file. For example, we could choose the name, “InformationDialog.cs”, and the class will be named InformationDialog. Clicking the “Add” button will then open a new Design Window containing a form.
We can then use the Design Window to build this form as we would build any other form. In addition, the Button class has a DialogResult
property that governs certain behavior when buttons are used within a dialog. This property is of type DialogResult
. Setting it to a value other than None will cause the button to do the following when clicked, provided the form is displayed as a modal dialog
:
- Close the form.
- Return the value of the DialogResult property.
Thus, we should set the “OK” button’s DialogResult property to OK and the “Cancel” button’s DialogResult property to Cancel. Once we have done this, there is no need to define any event handlers for these buttons.
Furthermore, the Form
itself has two properties that can be set to provide shortcuts for these buttons. The AcceptButton
property, of type IButtonControl (a super-type of Button), can be used to cause the “Enter” key to activate a button on the form, as if that button had been clicked. Thus, we could set this property to the “OK” button. Similarly, the CancelButton
property (also of type IButtonControl) can be used to cause the “Esc” key to activate a button on the form. We could therefore set this property to the “Cancel” button.
While we don’t need any event handlers for this dialog, we still need to provide code to allow the class for the main window to access the values provided by the user. This can be accomplished with three public properties
, one for each of the three pieces of information the user can provide:
/// <summary>
/// Gets the name.  (There is already a Name property inherited from
/// the Form class, so we will use FullName.)
/// </summary>
public string FullName => uxName.Text;

/// <summary>
/// Gets the phone number.
/// </summary>
public string PhoneNumber => uxPhoneNumber.Text;

/// <summary>
/// Gets the number of siblings.
/// </summary>
public int Siblings => (int)uxSiblings.Value;
In order for the main window to be able to display this dialog, it needs to construct an instance of it. We can add to its class definition a private field initialized to such an instance:
/// <summary>
/// The dialog for obtaining information from the user.
/// </summary>
private InformationDialog _information = new();
Finally, we need an event handler for the “Get New Information” button. This event handler needs to display the InformationDialog as a modal dialog, and if the user closes it with the “OK” button, to copy the information provided by the user to the main window. A Form provides two methods for displaying it as a dialog:
- Show
displays the Form as a non-modal dialog
. It takes no parameters and returns nothing.
- ShowDialog
displays the Form as a modal dialog
. It takes no parameters and returns a DialogResult indicating how the user closed the dialog.
Thus, the event handler can display the dialog and retrieve its information much like it would do with a file dialog
:
/// <summary>
/// Handles a Click event on the "Get New Information" button.
/// </summary>
/// <param name="sender">The object signaling the event.</param>
/// <param name="e">Information on the event.</param>
private void NewClick(object sender, EventArgs e)
{
    if (_information.ShowDialog() == DialogResult.OK)
    {
        uxName.Text = _information.FullName;
        uxPhoneNumber.Text = _information.PhoneNumber;
        uxSiblings.Text = _information.Siblings.ToString();
    }
}
This git repository
contains the complete program described above.